In this tutorial we'll create a very simple audio synthesiser application from scratch with a ui using tuix. The finished code for this tutorial can be found at: https://github.com/geom3trik/tuix_audio_synth
(WARNING: Don't have your volume too loud when using headphones)
Step 1 - Create a new rust project
Start by creating a new rust binary project:
cargo new audio_synth
In the generated Cargo.toml file inside the audio_synth directory, add the following dependencies:
[dependencies]
cpal = "0.13.1"
anyhow = "1.0.36"
tuix = {git = "https://github.com/geom3trik/tuix", branch = "main"}
crossbeam-channel = "0.5.0"
We'll be using cpal for the audio generation and crossbeam-channel for communicating between our main thread and the audio thread that we'll be creating.
Step 2 - Create a simple tuix application
To start with we'll just create an empty window application using tuix with the following code in our main.rs file:
use tuix::*;
use tuix::widgets::*;

use cpal::traits::{DeviceTrait, HostTrait, StreamTrait};

use std::thread;

fn main() {
    let window_description = WindowDescription::new().with_title("Audio Synth").with_inner_size(200, 120);

    let app = Application::new(window_description, |state, window| {

    });

    app.run();
}
To save some time the things we'll need from tuix and cpal have also been included at the top of the file.
Step 3 - Generating some sound
Before we populate our window with widgets, let's first write the code that will generate some sound.
First we'll start a new thread for the audio generation, get the default host and output device from cpal, and then call a run function that will generate the audio, which we'll write next. Add the following code to the beginning of our main function:
thread::spawn(move || {

    let host = cpal::default_host();

    let device = host
        .default_output_device()
        .expect("failed to find a default output device");

    let config = device.default_output_config().unwrap();

    match config.sample_format() {
        cpal::SampleFormat::F32 => {
            run::<f32>(&device, &config.into()).unwrap();
        }

        cpal::SampleFormat::I16 => {
            run::<i16>(&device, &config.into()).unwrap();
        }

        cpal::SampleFormat::U16 => {
            run::<u16>(&device, &config.into()).unwrap();
        }
    }
});
Because we don't know what sample format the default output config will give to us, we need to match on the sample format and make our run function generic over the sample type.
Now we'll write that run function which will build an output stream and play the audio. Add this code below our main function in the main.rs file:
fn run<T>(device: &cpal::Device, config: &cpal::StreamConfig) -> Result<(), anyhow::Error>
where
    T: cpal::Sample,
{

    // Get the sample rate and channels number from the config
    let sample_rate = config.sample_rate.0 as f32;
    let channels = config.channels as usize;

    let err_fn = |err| eprintln!("an error occurred on stream: {}", err);

    // Define some variables we need for a simple oscillator
    let mut phi = 0.0f32;
    let mut frequency = 440.0;
    let mut amplitude = 1.0;
    let mut note = 0.0;

    // Build an output stream
    let stream = device.build_output_stream(
        config,
        move |data: &mut [T], _: &cpal::OutputCallbackInfo| {
            for frame in data.chunks_mut(channels) {

                // This creates a 'phase clock' which varies between 0.0 and 1.0 with a rate of frequency
                phi = (phi + (frequency / sample_rate)).fract();

                let make_noise = |phi: f32| -> f32 {amplitude * (2.0 * 3.141592 * phi).sin()};

                // Convert the make_noise output into a sample
                let value: T = cpal::Sample::from::<f32>(&make_noise(phi));

                for sample in frame.iter_mut() {
                    *sample = value;
                }
            }
        },
        err_fn,
    )?;

    // Play the stream
    stream.play()?;

    // Park the thread so our noise plays continuously until the app is closed
    std::thread::park();

    Ok(())
}
Inside our run function are values for note, which is either 0.0 for off or 1.0 for on, amplitude, which varies between 0.0 and 1.0, and frequency, which we've set initially to 440.0 Hz.
If we run our app now with cargo run, a window should appear and you should hear a tone played continuously until we close the window.
Step 4 - Creating the controller widget
Preferably we would like the tone to only play when a key is pressed. To do this we're going to create a new custom widget that will be in charge of receiving keyboard events, as well as events from other widgets, and to generate and send messages from the main thread to the audio thread to control our oscillator.
First we'll define the messages that can be sent to the audio thread with an enum:
#[derive(Clone, Copy, Debug, PartialEq)]
pub enum Message {
    Note(f32),
    Frequency(f32),
    Amplitude(f32),
}
Then we'll define a new custom widget struct and it's implementation like so:
struct Controller {
    command_sender: crossbeam_channel::Sender<Message>,
}

impl Controller {
    pub fn new(command_sender: crossbeam_channel::Sender<Message>) -> Self {
        Controller {
            command_sender,
        }
    }
}
The Controller widget contains a crossbeam_channel which we'll use to send messages to the audio thread.
Next we'll implement the Widget trait for the Controller. In the on_build function for the implementation, we'll set the focused widget to this one so that keyboard events are sent to our Controller. We'll put our logic for sending a Note message when the Z key is pressed in the event handler on_event method, as shown below:
impl Widget for Controller {
    type Ret = Entity;
    type Data = ();

    fn on_build(&mut self, state: &mut State, entity: Entity) -> Self::Ret {

        state.focused = entity;

        entity
    }

    fn on_event(&mut self, state: &mut State, entity: Entity, event: &mut Event) {

        if let Some(window_event) = event.message.downcast::<WindowEvent>() {
            match window_event {
                WindowEvent::KeyDown(code, _) => {
                    if *code == Code::KeyZ {
                        self.command_sender.send(Message::Note(1.0)).unwrap();
                    }
                }

                WindowEvent::KeyUp(code, _) => {
                    if *code == Code::KeyZ {
                        self.command_sender.send(Message::Note(0.0)).unwrap();
                    }
                }

                _=> {}
            }
        }
    }
}
Here we use the KeyDown and KeyUp variants from WindowEvent and check if the input key is the Z key. Then we send a Note message using the command sender with Note(1.0) when the Z key is pressed and Note(0.0) when it is released.
To use this new widget we'll need to add it to our application and build it. First, create a crossbeam_channel by adding this line to the start of the main function:
let (command_sender, command_receiver) = crossbeam_channel::bounded(1024);
Then, change the code inside of Application::new(...) so it looks like this:
...
let app = Application::new(window_description, |state, window|{


    Controller::new(command_sender.clone()).build(state, window, |builder| builder);

});
...
If we run our app again now with cargo run nothing will have changed. This is because although we are sending messages, our audio thread isn't set up to receive them yet.
Step 5 - Reacting to messages
Now that messages are being sent by our Controller, we need to modify the code in our run function to receive these events and change our oscillator note value. Modify the run function to look like the following:
fn run<T>(device: &cpal::Device, config: &cpal::StreamConfig, command_receiver: crossbeam_channel::Receiver<Message>) -> Result<(), anyhow::Error>
where
    T: cpal::Sample,
{

    // Get the sample rate and channels number from the config
    let sample_rate = config.sample_rate.0 as f32;
    let channels = config.channels as usize;

    let err_fn = |err| eprintln!("an error occurred on stream: {}", err);

    // Define some variables we need for a simple oscillator
    let mut phi = 0.0f32;
    let mut frequency = 440.0;
    let mut amplitude = 1.0;
    let mut note = 0.0;

    // Build an output stream
    let stream = device.build_output_stream(
        config,
        move |data: &mut [T], _: &cpal::OutputCallbackInfo| {
            for frame in data.chunks_mut(channels) {

                while let Ok(command) = command_receiver.try_recv() {
                    // println!("Received Message: {:?}", command);
                     match command {
                        Message::Note(val) => {
                            note = val;
                        }

                        Message::Amplitude(val) => {
                            amplitude = val;
                        }

                        Message::Frequency(val) => {
                            frequency = (val * (2000.0 - 440.0)) + 440.0;
                        }

                         _=> {}
                     }

                 }

                // This creates a 'phase clock' which varies between 0.0 and 1.0 with a rate of frequency
                phi = (phi + (frequency / sample_rate)).fract();

                let make_noise = |phi: f32| -> f32 {note * amplitude * (2.0 * 3.141592 * phi).sin()};

                // Convert the make_noise output into a sample
                let value: T = cpal::Sample::from::<f32>(&make_noise(phi));

                for sample in frame.iter_mut() {
                    *sample = value;
                }

            }

        },
        err_fn,
    )?;

    // Play the stream
    stream.play()?;

    // Park the thread so out noise plays continuously until the app is closed
    std::thread::park();

    Ok(())
}
The run function now takes an aditional crossbeam_channel parameter, and notice that we've also now multipllied the sine function inside of the make_noise closure by the note value. Make sure to pass the command_receiver to the run function call inside our main, like so:
...
thread::spawn(move || {

    let host = cpal::default_host();

    let device = host
        .default_output_device()
        .expect("failed to find a default output device");

    let config = device.default_output_config().unwrap();

    match config.sample_format() {
        cpal::SampleFormat::F32 => {
            run::<f32>(&device, &config.into(), command_receiver.clone()).unwrap();
        }

        cpal::SampleFormat::I16 => {
            run::<i16>(&device, &config.into(), command_receiver.clone()).unwrap();
        }

        cpal::SampleFormat::U16 => {
            run::<u16>(&device, &config.into(), command_receiver.clone()).unwrap();
        }
    }
});
...
If we run this now the tone should play when we hit the Z key.
Step 6 - Adding control knobs
Time to add some controls for the amplitude and frequency of our simple oscillator. First, add some entity IDs to the Controller widget for the different knobs:
...
#[derive(Clone, Copy, Debug, PartialEq)]
pub enum Message {
    Frequency(f32),
    Amplitude(f32),
    Note(f32),
}

struct Controller {
    command_sender: crossbeam_channel::Sender<Message>,

    amplitude_knob: Entity,
    frequency_knob: Entity,
}

impl Controller {
    pub fn new(command_sender: crossbeam_channel::Sender<Message>) -> Self {
        Controller {
            command_sender,
            amplitude_knob: Entity::null(),
            frequency_knob: Entity::null(),
        }
    }
}
...
For now we initalise them with Entity::null(). Next, add the following lines into the on_build function of the Widget implementation for our Controller widget.
...
impl Widget for Controller {
    type Ret = Entity;
    type Data = ();

    fn on_build(&mut self, state: &mut State, entity: Entity) -> Self::Ret {

        let row = Row::new().build(state, entity, |builder| {
            builder
                .set_child_space(Stretch(1.0))
                .set_col_between(Stretch(1.0))
        });

        let map = GenericMap::new(0.0, 1.0, ValueScaling::Linear, DisplayDecimals::One, None);

        self.amplitude_knob = Knob::new(map, 1.0).build(state, row, |builder|
            builder
                .set_width(Pixels(50.0))
        );

        let map = FrequencyMap::new(440.0, 2000.0, ValueScaling::Linear, FrequencyDisplayMode::default(), true);

        self.frequency_knob = Knob::new(map, 0.0).build(state, row, |builder|
            builder
                .set_width(Pixels(50.0))
        );


        state.focused = entity;

        entity
    }
}
...
The Knob widget takes as input a map and a normalized value. For the amplitude knob we use a GenericMap which varies from 0.0 to 1.0 and set the default to 1.0. For the frequency knob we use a FrequencyMap which varies from 440.0 Hz to 2 KHz. We've also added a Row widget to space our controls out evenly.
Before we can run this and see our controls, we need to style them. Create a new file called theme.css in the src directory of this project. Then, add the following lines to this css file:
knob {
    width: 50px;
    height: 50px;
    background-color: #262a2d;
    border-radius: 38px;
    border-width: 2px;
    border-color: #363636;
}

knob>.value_track {
    background-color: #4f4f4f;
    radius: 30px;
    span: 5px;
}

knob>.value_track>.active {
    background-color: #ffb74d;
}
Then add this line somewhere at the top of the main.rs file:
static THEME: &'static str = include_str!("theme.css");
And add this line inside the Application::new() closure, before the call to Controller::new():
state.style.parse_theme(THEME);
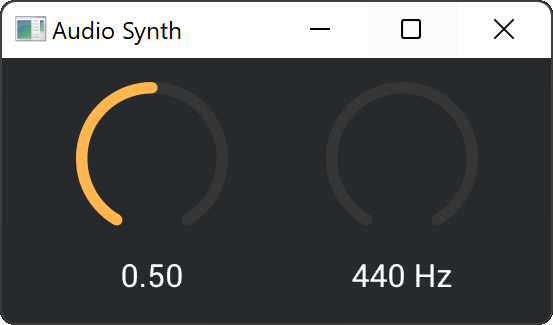
Running the app now should show a a pair of knobs, one for amplitude and the other for frequency.
NOTE: The knob widget in tuix is incomplete, and while they do function, not all style elements are in place such as the tick mark.
Step 7 - Connecting the control knobs
Now that we have some knob widgets for amplitude and frequency, we need to send some messages to the audio thread when the values of the knobs change. When a knob is used a SliderEvent::ValueChanged event is sent up the hierarchy from the knob to the root (window). We can intercept this event in our Controller widget by adding the following code to the on_event function in the Widget implementation.
...
if let Some(slider_event) = event.message.downcast::<SliderEvent>() {
    match slider_event {

        SliderEvent::ValueChanged(val) => {
            if event.target == self.amplitude_knob {
                self.command_sender.send(Message::Amplitude(*val)).unwrap();
            }

            if event.target == self.frequency_knob {
                self.command_sender.send(Message::Frequency(*val)).unwrap();
            }
        }

        _=> {}
    }
}
...
Note that the value received from the ValueChanged() variant is a normalized value, which is why we needed to convert the frequency in the run() function with the following code:
frequency = (val * (2000.0 - 440.0)) + 440.0;
And that's it! If we run our app now and press the Z key to play the tone we can now change the amplitude and frequency of the tone using the two knobs, even while the tone is playing. Note that we don't have any smoothing in place so sudden changes in amplitude or frequency may cause a crackling sound.
 4 Sep 23, 2022
 1.8k Jan 8, 2023
 38 Dec 8, 2022
 42 Nov 5, 2022
 11 Jan 2, 2023
 9 Nov 28, 2022

 1k Jan 7, 2023

 35 Dec 16, 2022


 5 Sep 16, 2022
 412 Dec 30, 2022
 6 Jun 3, 2022
 9 Jul 17, 2023
 4 Sep 4, 2023
 11 Sep 17, 2022
 6 Mar 8, 2023
 4 Jun 29, 2023
 3 Jun 8, 2022
 10 Sep 12, 2022